
KH 1203-1206 3-SLOT-TOASTER - Toaster BIFINETT - Notice d'utilisation et mode d'emploi gratuit
Retrouvez gratuitement la notice de l'appareil KH 1203-1206 3-SLOT-TOASTER BIFINETT au format PDF.

| Type de produit | Toaster à 3 fentes |
| Marque | BIFINETT |
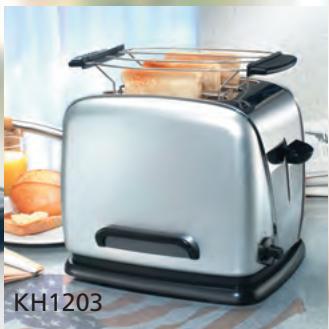
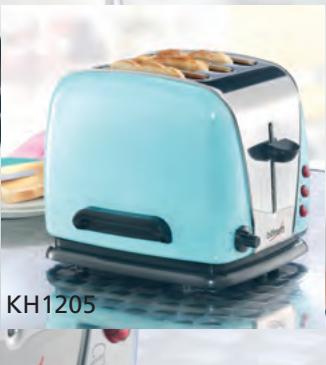
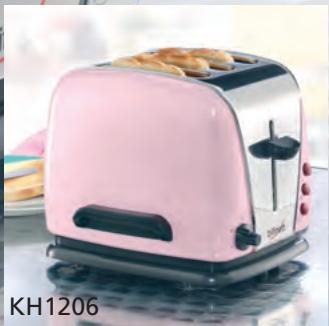
| Modèle | KH 1203-1206 |
| Tension nominale | 220-240 V ~ 50 Hz |
| Puissance nominale | 1200 W |
| Fonctions principales | Grillage, décongélation, réchauffage, arrêt d'urgence |
| Centrage automatique du pain | Oui |
| Lève-toast | Oui |
| Réglage du brunissement | Molette variable de clair à foncé |
| Support à petits pains | Oui, amovible |
| Tiroir à miettes | Oui, amovible latéralement |
| Type de commandes | Boutons poussoir (marche, stop, décongélation, réchauffage) et molette |
| Matériau du boîtier | Non spécifié (probablement plastique et métal) |
| Couleur | Non spécifiée |
| Entretien et nettoyage | Nettoyer avec un chiffon sec ou légèrement humide ; ne pas immerger ; vider le tiroir à miettes |
| Sécurité | Ne pas insérer d'objets métalliques ; ne pas utiliser près de l'eau ; ne pas couvrir ; ne pas laisser sans surveillance ; arrêt automatique |
| Pièces détachées | Tiroir à miettes, support à petits pains |
| Réparabilité | Non spécifiée ; en cas de défaut, contacter le service client |
| Usage prévu | Domestique : grillage de pain, petits pains et gaufres |
| Garantie | Selon les conditions du pays (voir carte de garantie) |
FOIRE AUX QUESTIONS - KH 1203-1206 3-SLOT-TOASTER BIFINETT
Questions des utilisateurs sur KH 1203-1206 3-SLOT-TOASTER BIFINETT
0 question sur cet appareil. Repondez a celles que vous connaissez ou posez la votre.
Poser une nouvelle question sur cet appareil
Téléchargez la notice de votre Toaster au format PDF gratuitement ! Retrouvez votre notice KH 1203-1206 3-SLOT-TOASTER - BIFINETT et reprennez votre appareil électronique en main. Sur cette page sont publiés tous les documents nécessaires à l'utilisation de votre appareil KH 1203-1206 3-SLOT-TOASTER de la marque BIFINETT.
MODE D'EMPLOI KH 1203-1206 3-SLOT-TOASTER BIFINETT

Kompernaβ GmbH · Burgstrasse 21 · D-44867 Bochum
www.kompernass.com
ID-Nr.: KH1203-6-07/06-V1
bifinett
KH1204
GB 3-Slot-Toaster
Operating Instructions

bifinett KH 1203/1204/1205/1206
3-Slot-Toaster
Proper use 4
Technical information 4
Operating features and controls 4
Important safety advice 4
Advice for use 5
Before using the toaster for the first time 5
Setting the browning control (toasting timer) 5
Toasting 5
Interrupting the toasting process 6
Warming function 6
Thawing function 6
Crumb drawer 6
Bread roll holder 6
Cleaning and maintenance 6
Disposal 7
Warranty and service 7
Read the operating instructions carefully before using the appliance for the first time and preserve this booklet for later reference. Hand over the manual to anyone, whom you pass on the appliance to.
3-Slot-Toaster
Proper use
This toaster is intended for home use of toasting slices of bread, rolls and toasted waffles. It is not intended for use with other foods, other materials or commercial or industrial use. Any other use or modification shall be deemed improper use and could give rise to considerable dangers.
Technical information
Nom. voltage: 220 - 240V ~ 50 Hz
Nom. power input: 1200 W
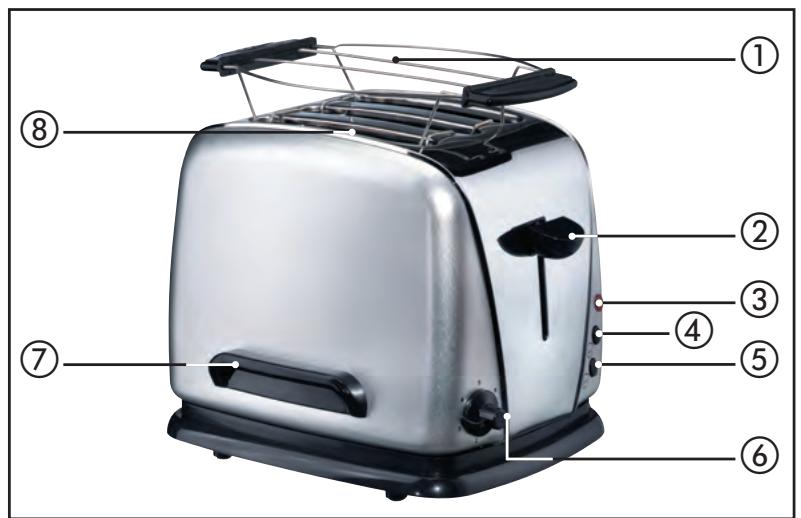
Operating features and controls
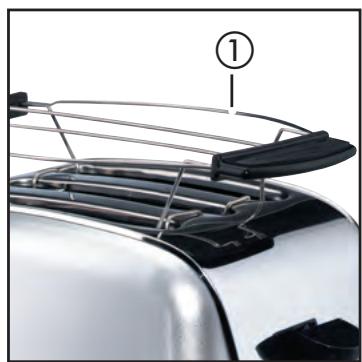
① Bread roll warmer
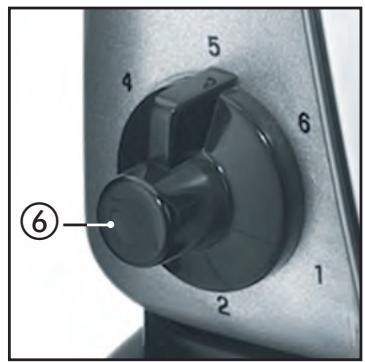
(2) Control button
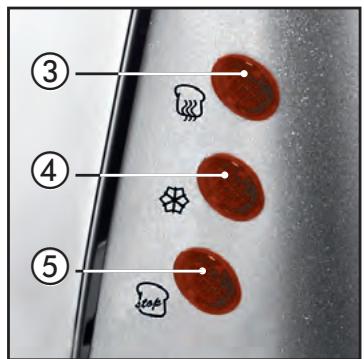
③ Warming button
④ Defrosting button
⑤ Stop button - for cancelling the toasting process
⑥ Browning control (infinitely controllable electronic toasting timer)
⑦ Insulated handle
⑧ Toasting slot
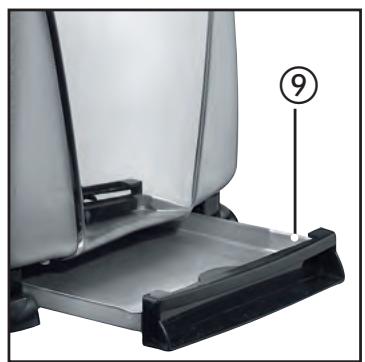
⑨ Crumb drawer
Important safety advice
Please observe the following instructions to avoid the hazard of electrical shock:
- Never put cutlery or other metallic objects into the toaster slits.
- Never allow the toaster to come into contact with water as long as the plug is in the socket (especially if you use it in a kitchen near the sink).
- Please ensure that the power cable never gets wet or moist when the toaster is in use. Never allow it to get pinched or otherwise damaged. Should the power cable or the plug get damaged, have the customer service replace it before you use the toaster again.
Always pull the plug out of the socket after use to make sure it is not used unintentionally.
Please observe the following instructions to avoid the hazard fire or injury.
- The toaster parts may get hot when in use. Therefore, only touch the handle and operating elements.
- Pasta can catch fire. Therefore, neverput the toaster under flammable objects, especially flammable curtains.
- Never cover the toaster when it is being used.
- Never leave the toaster alone when it is being used.
- Do not allow children or infirm persons handle heat-generating household appliances without supervision because they may not always be able to correctly assess potential hazards.
Only use the toaster on a stabile, non-slip and flat surface.
Advice for use
- Older, drier bread toasts quicker thanfresh bread. Wholemeal bread requires a higher browning setting than white bread.
- Do not use too large or over-thick slices as they are difficult for toaster to grip.
- Remove the plug from the socket during power cuts and when cleaning the toaster.
- Stuck slices can be freed using a short wooden stick (e.g. an artists' paint brush handle), so as not to touch the heating elements.
- Differences in the type of bread, moisture content and thickness of the individual slices affect the browning action of the toaster. Bread for toasting should be kept in a sealed package if possible.
Before using the toaster for the first time
Operate the toaster at least five times at the maximum setting without toast. For advice on cleaning the toaster, please read »Cleaning and maintenance«.
Please note: the loading button will only engage when the mains supply is connected. When the toaster is first used a slight smell may be noticed (and there may be a small amount of smoke). This is normal and only lasts for a short time. Ensure there is adequate ventilation.
Setting the browning control (toasting timer)
The desired browning setting can be chosen from 'light' to 'dark' using the variable control knob 6 to set the toasting timer.
Toasting
After setting the browning control, insert the bread and press down the loading button ②.
- The KH 1203-1206 automatic bread centring feature centres the inserted slice in the toasting slot (8).
- When the required browning level is reached, the toaster switches itself off automatically and then raises the toast.
- The KH 1203-1206 has a toast removal lever, which gives you a simple and safe way of removing hot slices of toast from the toaster slot. Just slide the lever ② upwards.
To achieve the same degree of browning over several consecutive toasting cycles, wait for about 1 to 1,5 minutes between each toasting cycle.
- Do not cover the slots ⑧ when using the toaster.
Interrupting the toasting process
If you wish to interrupt the toasting process, press the stop button ⑤ . The toaster switches off.
Warming function
The warming function ③ allows you to warm bread without toasting it. This function can be selected in the illuminated operating button display.
- Insert the bread and press down the operating button ②.
- Press the button for the warm-up function ③ .
- The toaster automatically shuts off and the slices of bread are raised.
Thawing function
By selecting the thawing function ④ you can thaw frozen sliced bread. This function can be seen in the illuminated operating button display.
- Insert the bread and press down the operating button ② .
- Press the button for the thawing function ④ .
- The toaster automatically shuts off and the slices of bread are raised.
Crumb drawer
The crumb drawer ⑨ collects any crumbs that fall down during toasting. To remove the crumbs, pull the crumb drawer out to the side.
Bread roll holder
- Never place the rolls directly on top of the toaster. Always use the bread roll holder ①.
- Place the bread roll holder on the toaster, put the rolls on top and switch the toaster on.
- As soon as the toaster switches itself off, turn over the rolls and switch the toaster on again.
Cleaning and maintenance
- Warning! Before cleaning remove the mains plug and let the toaster cool.
- Warning! For electrical safety reasons do not allow the toaster to come into contact with or be immersed in liquids.
- Do not use harsh or abrasive cleaners.
Clean the housing with a dry or slightly damp cloth.
Disposal

Do not dispose of the device in normal domestic waste.
Dispose of the device over a registered waste disposal firm or through your communal waste disposal facility. Observe the currently valid regulations. In case of doubt, consult your waste disposal facility.
Warranty and service
The warranty conditions and service centre address for your country are provided on the warranty card.
Komperna GmbH
Burgstrasse 21
D-44867 Bochum
www.kompernass.com
- bifinett
- 3-Slot-Toaster
- Proper use
- Technical information
- Operating features and controls
- Important safety advice
- Please observe the following instructions to avoid the hazard of electrical shock:
- Please observe the following instructions to avoid the hazard fire or injury.
- Advice for use
- Before using the toaster for the first time
- Setting the browning control (toasting timer)
- Toasting
- Interrupting the toasting process
- Warming function
- Thawing function
- Crumb drawer
- Bread roll holder
- Cleaning and maintenance
- Disposal
- Warranty and service
Marque : BIFINETT
Modèle : KH 1203-1206 3-SLOT-TOASTER
Catégorie : Toaster